


")


 – Scale (Geoffrey West)")
 – Jóga")


 – Cyanobakterie a první fotosyntéza")
 – První prokaryota, metanogeny a strom života")
 – Vznik života – RNA svět a mineralogická katalýza")


It’s been just over three months since Tacx announced what was shaping up to be the hottest trainer of the 2016-2017 winter season. You’ll remember that the main appeal of the Tacx Flux was that not only was it a direct drive trainer (wheel-off), but it would also be resistance controllable, fully compatible with apps like Zwift and TrainerRoad. And the icing on the cake? It’d be $300-$400 less than the Wahoo KICKR and similar trainers like the CycleOps Hammer and Elite Drivo.
Of course, the downside was that the stated/planned accuracy would be slightly less (at +/-5%) than higher end trainers– at least for the first 10 minutes during the warm-up period. Beyond that, it was hoped that accuracy would increase to +/- 2-3% (on-par with high-end trainers). The question is – was Tacx able to do that? I set out to find out.
Of course, the unit saw a few delays, which has led to it just started shipping here over the past few days. But I’ve had a final production unit for a few weeks though now, so I figure it’s time to roll out the in-depth review. Oh, and finally – Tacx sent over that loaner Flux unit to try out. Once I’m done here I’ll ship it back to them up in the Netherlands, like normal. You can use the links at the bottom of the post to help support the site. Let’s begin!
What’s in the box:
Let’s crack open the box and get this party started. First up is the outer packaging it arrived in. I suspect your average retailer won’t have that packaging on it, but I was kinda impressed that once I cut the blue straps, the sides fell right off like shattering a glass egg. Super cool in a geeky packaging kinda way.


That left us with the normal Tacx Flux box:

Opening up the top we’ve got a foam protector layer, with a few parts rising above.

We’ll get rid of that though and put everything in front of the box. As you can see, it’s all pretty straight forward. The unit basically comes in two major pieces: The main trainer portion, and then the front stabilizing leg.

The main reason they used this design over the articulating (and Star Wars like) Tacx NEO leg design is that this simply costs less. It costs less in components, as well as labor to build. Sometime this winter I’ll put together both my Elite and Tacx behind the scenes factory tours which talk about manufacturing, and you’ll see how the NEO is built and the complexity of that design. But back to the Flux…
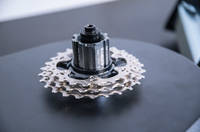
The EDCO free hub has a small blue condom over it, albeit non-Magnum trainer branded.

Here’s all the parts more carefully laid out on a table:


Of course, in order to use it you’ll need to spend about 5 minutes putting it together, so let’s move ahead to that.
Setting it up:

With the trainer basically coming in two pieces, the initial setup portion is pretty straightforward. But you’ve got a nifty quick-start guide to follow, should it be required after this post.
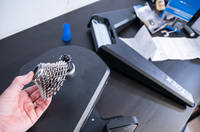
You’ll also need to have gone out and bought a cassette for the unit, as the Flux doesn’t include one. My mainstay cassettes are these Shimano Ultegra 11-speed cassettes. Obviously if you have a 10-speed bike, then buy the 10-speed version (or other brands). I’ve put these cassettes on all my inbound test trainers this and past winters, including: Tacx Neo, Tacx Flux, Elite Drivo, Elite Kura, Elite Real Turbo Muin, CycleOps Hammer, and whatever else I’m forgetting.

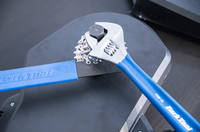
The first step in the build is actually installing that cassette, which you’ll need the correct tools for. That includes both a cassette locking tool (and wrench), and a chain whip. You can kinda get away without the chain whip in a pinch (using a towel and your hand), but you might get some vibrations without getting it nice and snug.
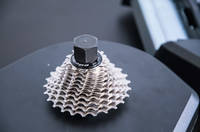
The process is pretty straight forward, and there are plenty of interweb sites for how to install a cassette on a hub. Nothing special/unique here about it:
Once that’s done, you’ll do the only assembly required on the Flux itself, which is these two bolts.

They’ll simply be inserted into the bottom of the leg, which then connects to the main body.

And…you’re done.

While it’s still a huge pet peeve of mine that trainer companies don’t include cassettes on direct drive trainers (except Wahoo), at least otherwise the setup here is quick and painless.
Usage Basics:

Like most trainers these days, the Flux is pretty easy to use. Gone are the days of a million wires and connectors to everything. It’s now all wireless, save for the power cord. Which…is a good place to start. The Flux does indeed require usage of the power cord, as it’s unable to provide changeable resistance without it.

The unit’s internal power supply is 110-230v, so it can easily be used in any country on earth, assuming you just have a simple $1-$3 adapter for the plug side of things.
Also unlike the more expensive Neo (or KICKR or Hammer or Drivo), there’s no folding of the legs. As you saw in the build process, the legs just bolt on and stay there. It can be a bit awkward to move around, since it lacks a handle on the unit. But I suspect for most of us, we tend to leave it where it is.

On the side of the unit are three small LED lights. These mirror that of the Tacx NEO, and are pretty similar to what’s also seen on Wahoo and Elite trainers these days. The three lights are:
Left: Bluetooth Smart connection
Middle: ANT+ Connection
Right: Power/Status
Here’s the lights for your viewing pleasure:

For example, when you make a connection via the Bluetooth Smart app to calibrate the unit, it’ll illuminate the Bluetooth Smart light. This can be handy in the event of troubleshooting, so you can validate other apps aren’t blocking the connection (since Bluetooth Smart only allows one concurrent connection at a time).

Meanwhile, the middle light will show you ANT+ FE-C control/connectivity, so if you’re running a desktop app like Zwift or TrainerRoad, most of you are probably going to use FE-C via an ANT+ USB adapter to control it rather than Bluetooth.
Speaking of calibration – the unit should be calibrated for each trainer ride. I prefer to calibrate right before the trainer ride, and then about 10 minutes in. As I discuss in the accuracy section, things seem to stabilize around the 8-9 minute marker, so that’s likely your best time to do so. This is pretty much the norm for all but a handful of trainers these days.
The calibration process only takes a few seconds. You can use the options within individual apps, or the Tacx Utility app on your phone. The calibration value is stored on the trainer, so you can mix and match as you see fit.
Within the Tacx Utility app you’ll connect to the trainer via Bluetooth Smart, and then complete a brief spin-up before coasting:


Meanwhile, 3rd party apps like TrainerRoad can do the same through FE-C. In fact, TrainerRoad will also remember the last time you calibrated the trainer, which can serve as a bit of a reminder.

The main purpose of buying a resistance-controlled trainer is of course the ability to automatically control resistance and power levels. This typically takes two common forms:
ERG Mode: Setting a specific power level – i.e. 225w. In this mode, no matter what gearing you use, the trainer will simply stay at 225w (or whatever you set it to).
Simulation Mode: Simulating a specific outdoor grade – i.e. 5% incline. In this mode, it’s just like outdoors in that you can change your gearing to make it easier or harder. Wattage is not hard-set, only incline levels.
There are variants of these that different trainer control protocols utilize, but basically everything gets back to one of those two ways of controlling a trainer. From a usage standpoint, different apps will focus on different things. For example, Zwift in regular mode will be setting the incline/grade, while TrainerRoad and Zwift in workout mode will be using ERG to set specific wattages.

Many people ask about road-like feel, and whether the trainer has ‘good road feel’ And honestly it’s quite subjective. But essentially people are looking at the inertia and how it feels – primarily when you accelerate or otherwise change acceleration (such as briefly coasting). A key driver of this is the flywheel size. Be it physical or virtual, flywheel sizes tend to be measured in weight. In general, the larger the flywheel size the more road-like feel.
The Tacx Flux has a flywheel of 7KG (silver disc, seen above), which sits in the middle of things. But flywheels rarely tell the whole story. For example, Elite on their Drivo has a multi-belt system, which effectively doubles the inertia feeling. Whereas Wahoo has a higher flywheel weight. And then Tacx on their Neo has no flywheel at all, but rather a really good simulation of it.
For me personally, it’s hard to separate the fact that I’m riding indoors from outdoors. It’s still a trainer, and I’m still looking at a wall in front of me. My brain can only turn that off so much. All that said, no, you don’t have the same inertia feeling on the Flux as you do on the KICKR or NEO or Drivo. It’s not bad, but it’s just not going to feel like those more expensive trainers. Nor does it feel like some cheaper trainers that don’t have electronic control (i.e. LeMond Revolution Pro).
Now it used to be that you’d use apps by the trainer companies themselves to control your trainer. But these days that’s far less common. Sure, companies like Elite, Tacx and others do make trainer apps (and the one from Tacx is one of the biggest). But the vast majority of consumers go with the vast collection of 3rd party trainer apps. In my case, I just focused on testing in the most popular ones – TrainerRoad and Zwift, as well as the Edge units (more on that later).


In order to cover all the apps though for those that are curious, you can check out my recently published (and massive) Winter 2016-2017 trainer app guide. It covers over 20 different apps, the vast majority of which work with the Tacx Flux.
App & Protocol Support:

The Tacx Flux follows in the footsteps of all of the Tacx ‘Smart’ branded trainer lineups and supports some of the broadest industry standards out there, arguably more than Wahoo does (arguably being the key word). In fact, Tacx was the very first to adopt the ANT+ FE-C standard some 18 or so months ago. Since then, virtually every trainer company has followed in their footsteps.
This means that it’ll transmit across ANT+ & Bluetooth Smart, while also allowing resistance control across ANT+ & Bluetooth Smart. Resistance control is what enables apps to specify what resistance level the trainer is at, such as wattage and slope.
The Tacx Flux supports the following broadcast and control standards:
ANT+ FE-C Control: This is for controlling the trainer via ANT+ from apps and head units. Read tons about it here.
ANT+ Power Meter Profile: This broadcasts as a standard ANT+ power meter
ANT+ Speed/Cadence Profile: This broadcasts your speed and cadence as a standard ANT+ Speed/Cadence combo sensor for apps/watches that may not understand the power meter protocol.
Bluetooth Smart Control: This uses the Tacx variant of BLE control, the same as their other Smart Trainers. There is no BLE trainer control standard; each company does their own thing. Though, aside from Wahoo, Tacx has the second best support in apps over Bluetooth Smart.
Bluetooth Smart Power Meter Profile: This broadcasts as a standard BLE power meter
Bluetooth Smart Speed/Cadence Profile: This broadcasts your speed and cadence as a standard BLE combo Speed/Cadence sensor
Within these standards you can basically control or connect to the Flux from just about any 3rd party app or device out there. If an app doesn’t support one of these protocols, it probably sucks horribly. Zwift, TrainerRoad, Kinomap and dozens more support these. As do head units like Garmin, Wahoo, Lezyne, Stages, and more. The power of using standards! No pun intended.
Interestingly, just this past weekend TrainerRoad added support for controlling Tacx trainers via Bluetooth Smart from their iOS apps. This is notable because previously it would have required an ANT+ adapter to do so. This makes it effectively on par with Wahoo in that respect.

In my usage of the Flux, I’ve utilized it with: Garmin Edge 520, Garmin Edge 820, Edge 1000, Zwift, Tacx Utility App, and TrainerRoad. I had no problem doing calibration within TrainerRoad using ANT+ FE-C, and also was able to calibrate on behalf of Zwift using the Tacx Utility App over Bluetooth Smart. The trainer will remember calibration values from other apps, so you can quickly use the Tacx Utility app on your smartphone to set a new calibration value.

One minor caveat to note that’s not specifically Tacx’s fault, is that Garmin semi-recently broke their ANT+ FE-C support on the Edge 1000 and Edge 820. Specifically the ability to set a given wattage level (i.e. 250w). This will appear to work until you go to change the wattage set-point, at which point it’ll switch to resistance level mode (no wattage option). Mind you, this isn’t a Tacx problem, as Garmin broke it for everyone (Tacx/Wahoo/Elite/CycleOps/etc…). It’s been annoyingly broken for a few months now, though Garmin is aware of the breakage. Note that this functions just fine on the Edge 520.
Note that the above does not impact recording standard ANT+ power data, but rather, just directly wattage set-point control from your Garmin. Hopefully Garmin will un-f-it-up soon. (Update: Garmin says that should happen next week)
Sound Levels:

Measuring the sound of silence. One of the most requested things y’all ask me to do with trainers.
Let’s get this out of the way: The Tacx Flux isn’t silent. It’s not like the Neo (which costs twice as much). But it’s not noisy either. It sits in what I’d define as the gray zone. I say that because it actually has a rather unique sound that I haven’t heard on other trainers before. A very low hum ‘rough’ sound. It’s not bad, and you honestly don’t notice it after 30-60 seconds. You can hear it in the video below and decide for yourself.
First however, something to note about noise testing. Someday I’ll write all about trainer sound and noise testing. I’ve learned a lot over the years, and the more I do the more I realize how hopeless it really is to give folks a truly accurate view of the sound levels in videos (let alone measure them). There are a massive number of environmental factors that truly do have a huge impact:
– The room materials (which can make trainers quieter or louder due to echo, noise dampening, etc…)
– The size of the room
– The exact distance of the camera and/or decibel meter
– The mode of the decibel meter
– The type of mics used
– The sound levels of the mics used
– The exact position of the mics relative to different sides of the trainer
– How the mics capture different tones
– How I edited the audio (normalized levels)
– The speed of the trainer
– The cleanliness of the drivetrain on your bike
– The shifting accuracy (tuning) of your bike’s drive train
– Whether or not I remembered to turn on the @#$@# mics
– And other items I’m likely forgetting
Any one of these items can make the entire trainer sound dramatically different. I think I might put together a funny video showing just this some day. Maybe I’ll pretend to be different people on YouTube, just to demonstrate how different I can make a single trainer sound. All of which makes doing repeatable tests over the course of years very difficult. So instead, I’m going to focus on ‘in the now’ type tests by showing two trainers side by side in as close of conditions as possible.
In the meantime, I’m going to continue using my handy dandy decibel meter stoplight (this first video explains how it works, while the second video shows the Flux):

To demonstrate how this trainer sounds, I’ve stacked it up against the KICKR2 and the Tacx NEO. I go side by side with them. It’s a new pinnacle in my video editing skills (I set my bar pretty low), but it gives you a side by side back and forth comparison between three units spaced identically apart with virtually identical setups across the board. It’s probably as absolutely close to a perfect setup I can get given the conditions I have. If someone would like to purchase a soundstage for me in central Paris, I’ll consider a DCR Annex. Until then, go forth and enjoy:
As you can see, the biggest difference is between the NEO and the Flux. For the KICKR2, it’s not so much quieter or louder than the Flux, but just different tones. As noted earlier, the Flux isn’t the quietest trainer out there, but it’s not bad either. Plus, most people have a fan running anyway – often zapping any further sound savings.
Accuracy Testing:

Next up is accuracy. This has been the biggest question mark over the Flux since it was announced this past summer. At $899 for a direct drive trainer, it’s undercutting the direct-drive controllable trainer market by about $300 (or more), notably against the Wahoo KICKR2, Elite Drivo, and CycleOps Hammer. That’s a pretty substantial amount. Or some $700 compared to the higher end Tacx NEO.
(Sidebar Note: Albeit priced at the same level, the Elite Kura isn’t in this competition, because it doesn’t have controllable power, though it does instead have a legit power meter in it like the Drivo.)
But the question on everyone’s mind has been that stated accuracy. Tacx has officially listed the trainer at +/-5%, which is on par for wheel-on trainers in the $500-$600 range (i.e. KICKR Snap, Tacx Vortex, CycleOps Magnus, Elite Rampa). But they also caveated that if you exclude the first 10 minutes during a warm-up period, then the accuracy would actually be closer to 2-3%, which is on par with those $1,100+ trainers I mentioned earlier.
That wording is actually somewhat funny, because if one applied the same ‘rules’ to something like the well-known CompuTrainer, they’d find virtually the same thing. It needs a warm-up and calibration period of about 15 minutes, after which it’s pretty stable at +/-2%.
So let’s start with that warm-up period and analyze what’s happening there. As with all trainers (that allow it), I always do a calibration prior to starting my ride. That’s effectively calibrating against the current air temperature, in the event it changes. For me, it actually doesn’t change much – so it’s more of a formality. What Tacx (and most other trainers) are actually looking for after that 10 or so minutes is heating up within the trainer that can impact things. By that point parts have warmed up and stabilized.
Below is a chart over the first 13 minutes of the trainer ride, comparing against a Quarq Riken and Stages (left only).

Now typically what I see with other trainers occur is that you need to re-calibrate around the 10 minute marker in order to get more accurate results for the remainder of the ride. But that’s not what I’ve been finding here. In fact, it seems to self-correct pretty well by about the 8-9 minute marker. That’s about the point in which things merge and life becomes happy within a few watts – no calibration required (though, probably still advised for the heck of it).

Whether this has been a fluke or not, I’m not sure – but it’s definitely been the case over a number of shorter 8-12 minute rides I’ve been doing eyeballing things. It’ll start off about 5% off, and then ends up in the 2-3% range.
So let’s then reset things and start into a TrainerRoad workout that’s specifically designed to test quick changing power numbers across a large gap. In this case I’ve standardized on a 30×30 workout that has 30 seconds hard, and then 30 seconds easy. It’s a very common cycling workout, where you do repeats a number of times (often 15-30 minutes worth). In my case I decided to increase the gap (power shift) which makes the test harder on both me and the trainer. Here’s what the workout structure looks like:

And here’s me going into it. One interesting oddity I noticed is that there’s definitely some minimum time before TrainerRoad is taking control over the trainer at the beginning of the workout. It seems to be about 45 seconds before it kicks in and ‘owns’ the power control. Not a huge deal, but I did the first portion of this test about 5 times thinking I was going crazy, but sure enough – it does kick in.

At that point, things control just fine and dandy. It takes about 2-4 seconds for the shift from approximately 200w to 480w. This is roughly on par with other trainers, perhaps a second slower, but it’s unlikely to make much of a difference. As I’ve noted elsewhere, you actually don’t want a trainer to go from 200w to 500w in less than a second. It’s like hitting a brick wall.

(In case you’re wondering, that fluctuation on the last interval is simply my legs struggling…)
So how’s the accuracy? Not bad, though, you notice a slight delay on both sides of each interval with it picking up the higher power numbers. It overlaps that same 2-4 seconds, so it’s not a huge deal, but it’s certainly there.

(Note: The one-second drop you see at the 4ish minute marker appears to be signal interference related on the Edge 520 I was recording this on, as it doesn’t appear on the TrainerRoad data stream. Said differently: It’s not the Flux.)
Compare that same chart to the one on the Elite Drivo in that accuracy testing section– and you can see just how precise that trainer is:

(Note: In my Tacx Flux chart I’m showing a Stages left-only unit compared to the more accurate dual-leg PowerTap P1 system shown in the Drivo chart. You thus see a very notable impact of single-leg imbalance when I go above my FTP substantially.)
Of course again – does that 1-2 seconds matter when you’re saving $400? Probably not for most people, especially if you aren’t doing super short range stuff. You can see that after that few seconds it matches the Quarq Riken quite nicely. And, I noted in that review section that particular graph may have been the most beautifully perfect power meter graph I’ve ever analyzed. Ever.
One final thing I noticed was that I was experiencing a bit of a resistance ‘floor’ in the trainer in this particular gearing combination (big ring up front, mid-rings in back). TrainerRoad talks about the resistance floor here some. Ideally I would have changed my gearing to avoid that, which inhibits my ability to hit the lower power target specified.
Next up, let’s look at Zwift. In this case I started out around town on Zwift Island, before heading up into the mountains for some steeper climbs. This would enable me to test the trainer in a different mode than that of TrainerRoad. Within TrainerRoad, it’s using ERG mode, so it’s presetting the power at a given value. Whereas within Zwift it’s simulating a given incline % (i.e. 5%). Here’s the routes and inclines I took:

So the first part of the ride was mostly on the flats for a few minutes, rollers and such. Then I started the long climb up Zwift Mountain. It was about 25-30 minutes of climbing at an incline of generally 5-8%. However, at around the 40 minute marker, I hit the next section which is at 13-16%.

But I’ll get to that in a moment. Here’s the overall plot:

As you can see, things were very close across the vast majority of it. If I pick a random spot to zoom in, you can see they tracked quite nicely within a few watts:

Even this burst over 600w tracks pretty nicely:

However, at about the 40 minute marker I took a sharp turn up a different road on the mountain, which dramatically increases the incline. In a default Zwift configuration (that I was using), the trainer difficulty setting is configured for 50%, which means that it basically halves your incline level on the trainer. However, it still requires the same amount of power (math magic behind the scenes to even things out), but this is done to basically make it more ‘attainable’ for cheaper trainers that can’t necessarily hit the higher incline numbers. For example, the Tacx Flux is limited to 10%.
In any case, when I did that, things went a bit wonky:

As you can see – a difference of some 150w without explanation for about 5 seconds. After that, they settled back down, but it wasn’t as accurate as before (albeit well within the 5%). Meaning, the now higher simulated inclines seemed to be decreasing accuracy slightly. That makes little sense because I’m still looking at reported power output – almost as if some backend math is going wrong. Again, we’re not talking a huge spread there, depending on which power number you want to compare to – but it’s clearly noticeable compared to prior to that moment. The green line is the Flux, floating above the others by roughly 10-15 watts.

Whereas earlier in the ride, it was in the mix like everyone else:

Now – this is me nitpicking things a bit. This accuracy is still equal to or better than all the other $500-$600 trainers out there that I mentioned before. It’s just an interesting quirk. I’ve brought it up to both Zwift and Tacx, and it sounds like they’re looking into it. My suspicion is that it may be more of an algorithm thing that’s easily fixed, since it seems tied to specific inclines and specifically in Zwift.
I’ll update this section accordingly once I have more information as to what’s going on.
Finally, one last accuracy test I want to briefly touch on was back in another TrainerRoad session. In this case I did a test where I didn’t specify a given ERG mode, but rather just let myself control the resistance through gearing. Overall, you can see things handled really well. You’ll also notice that tell-tale stabilization at the 8-minute marker I mentioned earlier.

But I do want to call attention to one area, which is slowness on the first few seconds of a hard sprint. You can see this a little bit within my Zwift rides, but it’s easier to pick-out here because I…well…structured it that way on purpose. Note towards the end those sprints. Above I’ve got it smoothed to 5 seconds, below, I zapped the smoothing so you can see it more clearly.

It totally misses the first few seconds at ~700w. Of course, anytime you talk about peak power there’s variability. In this case there’s almost 70w of variability between the Stages and the Quarq (partially due to single-leg, partially just timing). Either way, we can agree that 400w is just missing the boat.
Why? Well, the Flux isn’t measuring it, but rather estimating power (again, like all mid-range trainers). In this case, it seems to take a few seconds to catch that. In my case, I didn’t sustain 700w for more than a few seconds, so it settles down at the lower number (400w) with everyone else. Like before, this is a case where those first few seconds are different between legit real power meters, and the Flux.
So where does that leave us? Well, I’d put the Flux in the camp of having a few quirks, but overall good. In this section (like all my accuracy sections), I dive into the errors more than where things went wrong. So if you look at the above ride, the ‘went wrong’ section is merely a few seconds out of 30 minutes. Same goes for the Zwift case. These errors are at this point very predictable. They are limited delaying/underreporting to the first few seconds of a major shift in power.
If I was looking for a direct drive option that’s controllable and didn’t want to spend $1,200+, I’d probably choose this direct drive option over the others, understanding those limitations. For steady-state workouts (like 99% of what you’d be doing in TrainerRoad, or even Zwift), this is spot-on. But for that less than 1%, you’ll have to decide if it matters to you.
(Note: You can download all of the data from these tests within the links provided at the beginning of each test. You can also slice and dice the data in more detail there as well.)
Trainer Comparison:
The Tacx Flux is already located within the product comparison database in the trainer section, so you can dive into all of the differences between that and other units on the market. For the heck of it, I’ve placed it below next to the Tacx NEO, Wahoo KICKR2, and CycleOps Magnus. I don’t have a review out yet for the Magnus, though that should be my next released trainer review. Keep in mind you can mix and match any trainers you want to make your own charts in the product comparison database tool here.
| Function/Feature | Tacx Flux | CycleOps Magnus | Tacx NEO Smart | Wahoo Fitness KICKR2 (2016) |
|---|---|---|---|---|
| Copyright DC Rainmaker – Updated December 6th, 2016 @ 8:37 amNew Window Expand table for more results | ||||
| Price for trainer | $899USD/799EUR | $599 | $1,599USD/1,399EUR | $1,199 |
| Attachment Type | Direct Drive (no wheel) | Wheel-On | Direct Drive (no wheel) | Direct Drive (no wheel) |
| Available today (for sale) | YEs | Yes | Yes | Yes |
| Uses mouse/keyboard as control unit | Yes (with apps) | YES (WITH APPS) | Yes (with apps) | YEs (with apps) |
| Uses phone/tablet as control unit (handlebar) | Yes (with apps) | YES (WITH APPS) | Yes (with apps) | YEs (with apps) |
| Power cord required | Yes | Yes | No | Yes |
| Flywheel weight | 6.7kg (simulated 25kg) | 2.6lbs/1.2kg | Simulated/Virtual | 12.5lbs/5.7kgs |
| Includes motor to drive speed (simulate downhill) | No | No | Yes | No |
| Maximum wattage capability | 1,500w | 1,500w @ 20MPH | 2,200w | 2500w @ 30MPH |
| Maximum simulated hill incline | 10% | 15% | 25% | 20% |
Again, keep in mind you can make your own comparison chart here in the product comparison tool here.
Summary:

So did Tacx manage to pull off what many dubbed as a potential ‘KICKR Killer’?
Sorta.
It’s a trainer that will without question impact sales of not just the KICKR, but many other trainers in the $1,200 price range – and probably even some Tacx Neo units at nearly twice the price.
Did they manage to pull off something fairly impressive and unseen at this price point though?
Absolutely.
Anyone (or any company) who doesn’t think that the Flux will hugely impact next seasons 2017-2018 trainer options is kidding themselves. All three major companies remaining (Wahoo/CycleOps/Elite) are going to have to come back with direct drive options in that same price/feature ballpark for next year. If for no other reason that by then we could see Tacx (or something else) drive that price-point for a direct drive controllable trainer even lower. But let’s not get ahead of ourselves – that’s a year away.
None of which should take away from the reality that the Tacx Flux is a very solid trainer for this year. It’s quite accurate after the typical warm-up period, though does seem to have some slight variations in the first few seconds of hard sprints. I wouldn’t be surprised though to see Tacx rectify those to some measure in software updates (just like Wahoo had to do this fall upon the release of the KICKR2).
I’d say that at this point, the Flux represents the best bang for the buck in the controllable trainer world. It’s a near-perfect price hybrid between the benefits of a direct drive trainer, while still being more accurate than the options at the price point just below it. Said differently: Tacx seemed to largely deliver on what they promised.
With that – thanks for reading!
Found this review useful? Or just want to save 10%? Here’s how:

Hopefully you found this review useful. At the end of the day, I’m an athlete just like you looking for the most detail possible on a new purchase – so my review is written from the standpoint of how I used the device. The reviews generally take a lot of hours to put together, so it’s a fair bit of work (and labor of love). As you probably noticed by looking below, I also take time to answer all the questions posted in the comments – and there’s quite a bit of detail in there as well.
I’ve partnered with Clever Training to offer all DC Rainmaker readers exclusive benefits on all products purchased. You can read more about the benefits of this partnership here. You can pickup the Flux trainer through Clever Training using the links below. By doing so, you not only support the site (and all the work I do here) – but you also get to enjoy the significant partnership benefits that are just for DC Rainmaker readers. And, if your order ends up more than $75, you get free US shipping as well.
Tacx Flux Trainer (for US folks)
Tacx Flux Trainer (for Europe folks)
Thanks for reading! And as always, feel free to post comments or questions in the comments section below, I’ll be happy to try and answer them as quickly as possible.

