While there are many power meter options being touted these days, it’s a different matter to actually get something shipped to consumers. And to do something that’s accurate and trusted (as well as reliable). It’s been a couple years now since 4iiii started shipping power meters, and as of two summers ago when they shipped their left-only unit they’ve been quite a reliable as well as inexpensive option. Within that product things have been accurate and I see very few complaints (almost none actually).
But that was on their single-leg system. What would happen when they started shipping their dual left/right system? Well, I set out to find out. This past fall the company started shipping that to consumers, including a media loaner unit to myself. Since then I’ve been testing and comparing it to a slew of other power meters on the market on daily rides.
With a system priced at $749 for a complete dual left/right offering installed on your existing crank arms, it’s one of the lower cost options on the market – so would it be accurate? And is it reliable through the water-logged winter conditions? Let’s dig in.
Clarifying the options:
Before we get too far along, it’s probably worthwhile to backup a bit (or a lot) and talk about how we got here, and exactly what this review is covering. There are some nuances that are important to consider in this solution.
If we turn on the ‘way-back’ machine to September 2014, 4iiii launched at Interbike that year with what was planned to be a self-installable power meter. You’d use some glue they provided, a bit of craftiness, and boom – inexpensive power meter on your existing crank arms. While that may eventually be in the cards, the company switched directions after they said they had issues shipping said glue to consumers, due to shipping regulations around the glue itself (i.e. hazmat type stuff).
That led them to the scenario where you could send them your crank arm (left-only at the time), and they’d return it a short bit later with the power meter installed for you. A few months later, they started offering the ability to buy pre-configured crank arms with the power meter already installed on it. That not only got you a new Precision power meter, but also a new crank arm. But this was all still left-arm only, and it was that product that I reviewed just over a year ago.
There’s nothing specifically wrong with left only, but it’s just restrictive in it’s ability to be accurate. It’s only measuring one leg and doubling it (just like Stages does). But as has been well demonstrated since then, your left/right balance varies not just day by day, but also often by intensity. For example, I’m reasonably balanced up until my FTP, above which I become quite imbalanced. Same goes for when I fatigue – which could be 1 hour or 4 hours into a ride, depending on intensity.
Of course, they were still working away on a right-only solution, that I previewed in the fall of 2015. But it wasn’t until last spring at Sea Otter (2016), that they announced their specific dual plans. This included details on their complete dual left/right setup, as well as upgrade options for those with left-only units that wanted to become left/right.
And that’s what this review is all about: The dual setup, with sensors on both the left and right arms.
So, just to recap what the basic 4iiii power meter product options/prices are:
Precision Pro Dual Sided installed on your crank arms: $749USD
Precision Pro Single Sided installed on your left crank arm: $399USD
Precision Pro Single Sided installed on your right crank arm: $599USDPrecision Single Sided (Left) including a new crank arm: $399USD to $599USD
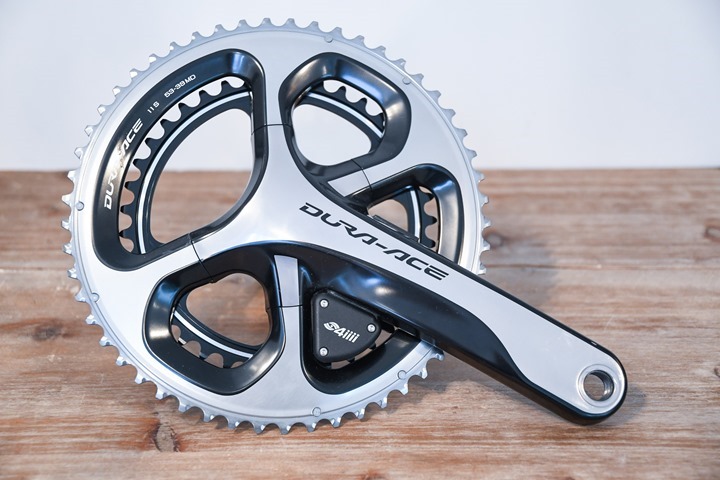
Precision Dual Sided (Left/Right) including full new Dura Ace crankset: $1,499USD
Note that 4iiii lists all of their crank compatibilities on their site, though at this point their dual left/right compatibility list is a single line item: Shimano DuraAce FC-9000.
Got all that? Good. Let’s get cookin’.
Unboxing:
Of course, what’s in your box will vary based on what you bought. In my case, it’s got the full Shimano Dura-Ace configuration for dual left/right. If you bought a left-only configuration, then you’ll want to see my previous review on the left-only solution. Whereas if you buy the right-only version installed on your crank arms, then it’ll simply be lacking the left-arm sensor.
In any event, here’s the box opened up:
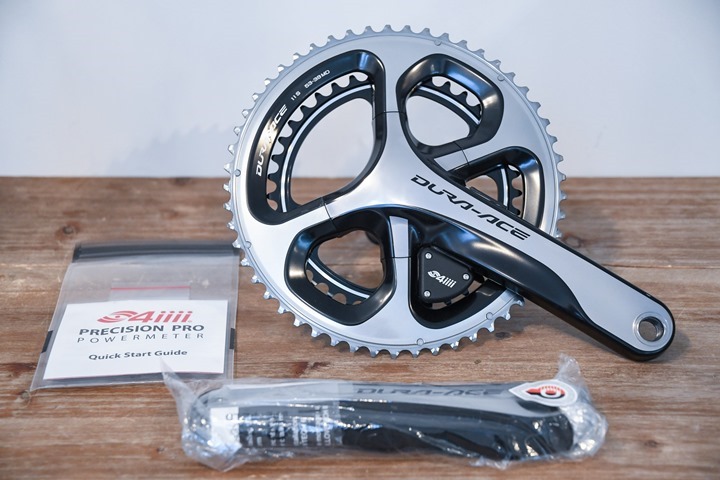
And then once I remove the parts from their cardboard friends, you’ve got this:
All of which boils down to:
A) The drive side (right side) crank/arm
B) The non-drive side (left side) crank arm
C) A plastic phone protector (consider it a gift)
D) A quick start guide
E) A small wrench for opening battery compartment
D) An extra two batteries (CR2032)
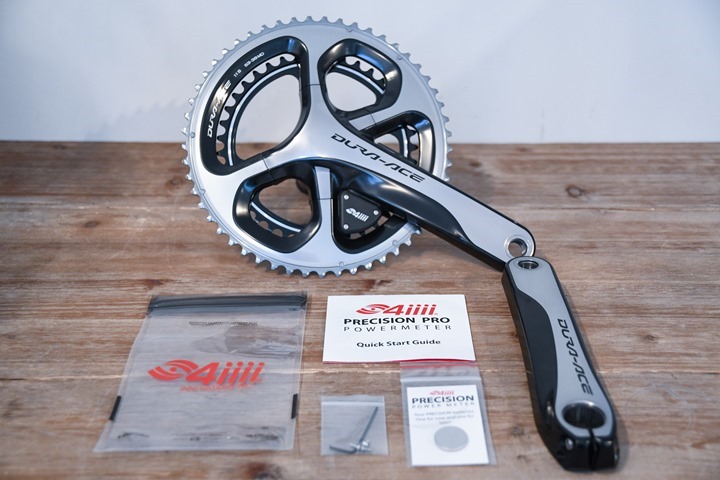
And the photographic version of that:
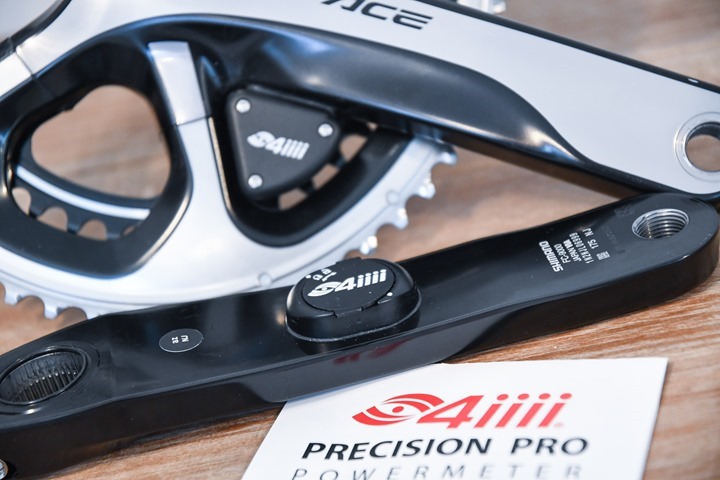
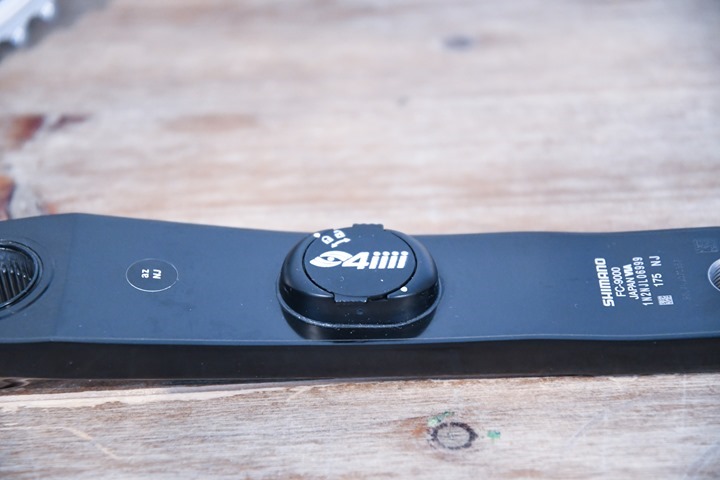
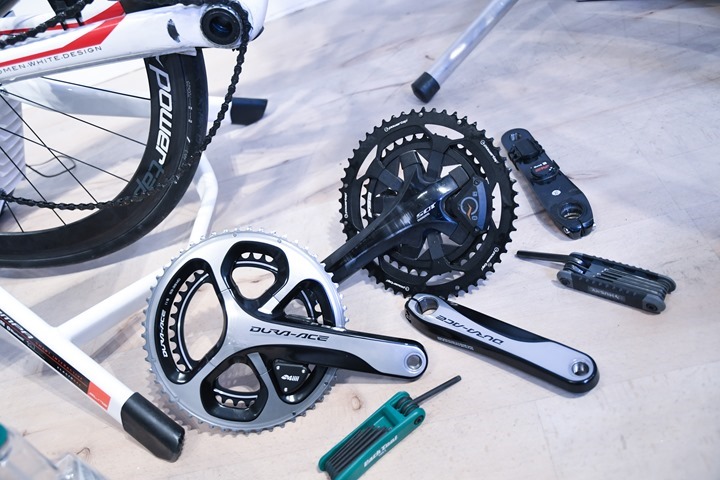
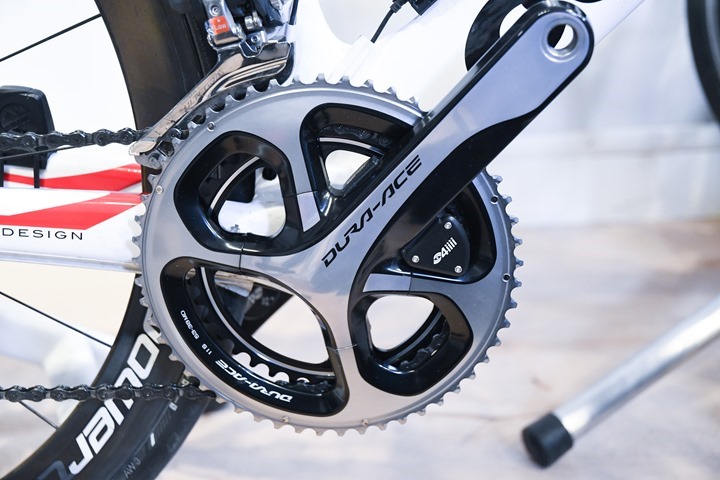
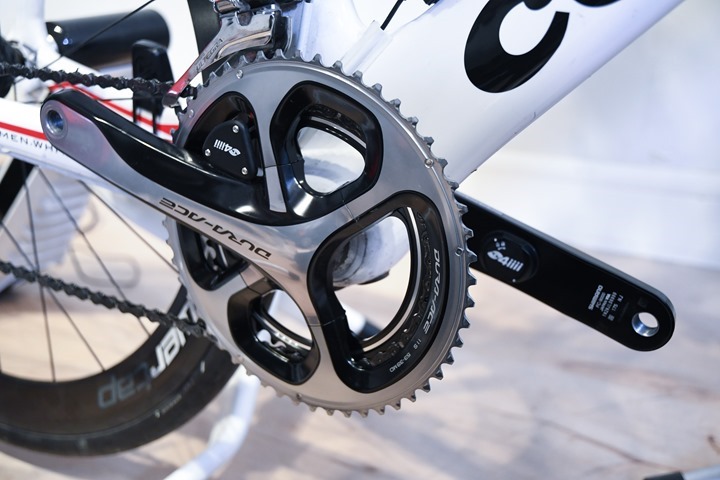
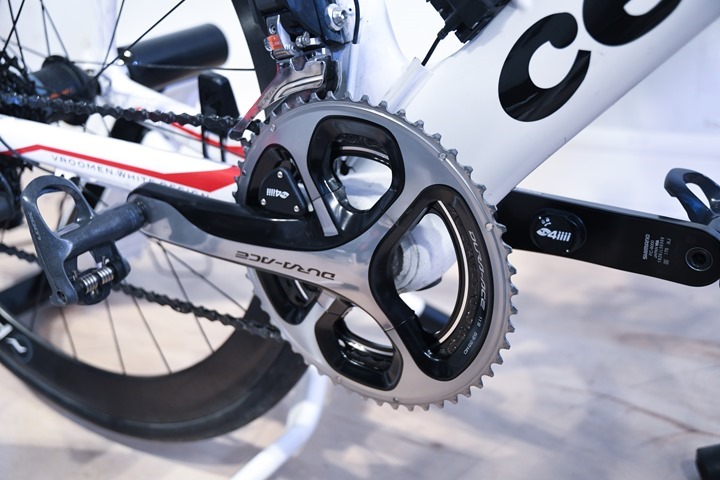
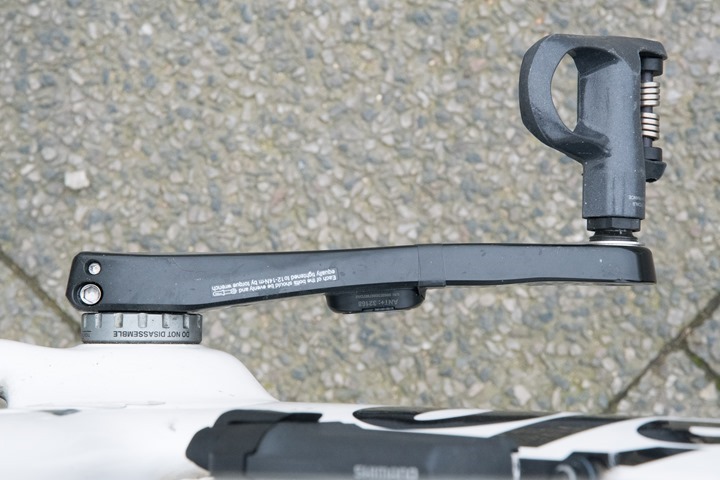
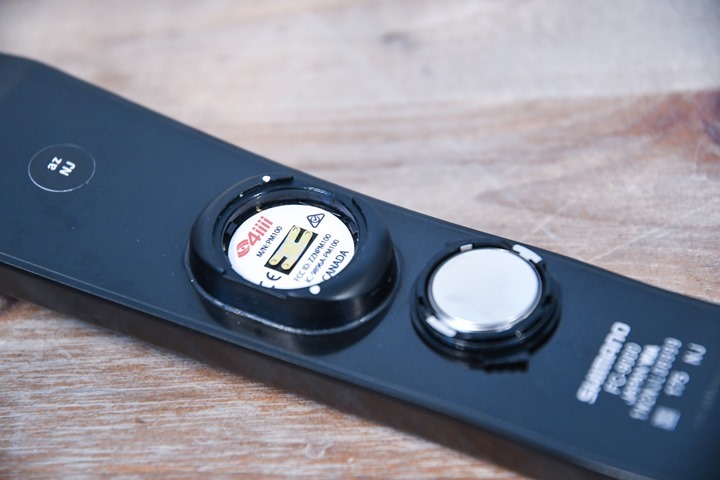
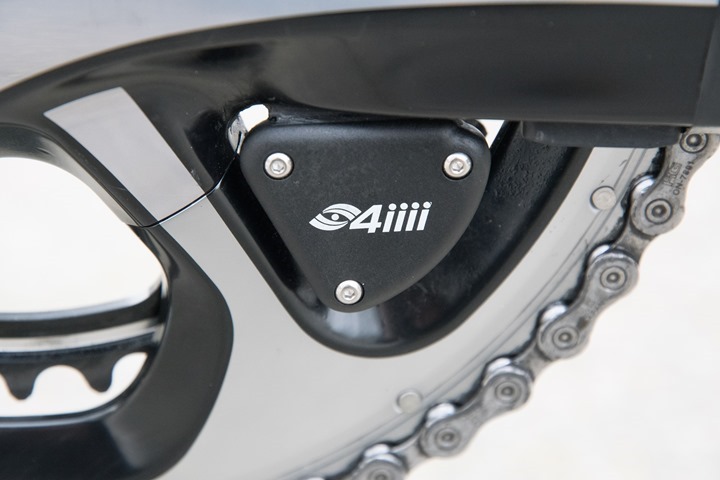
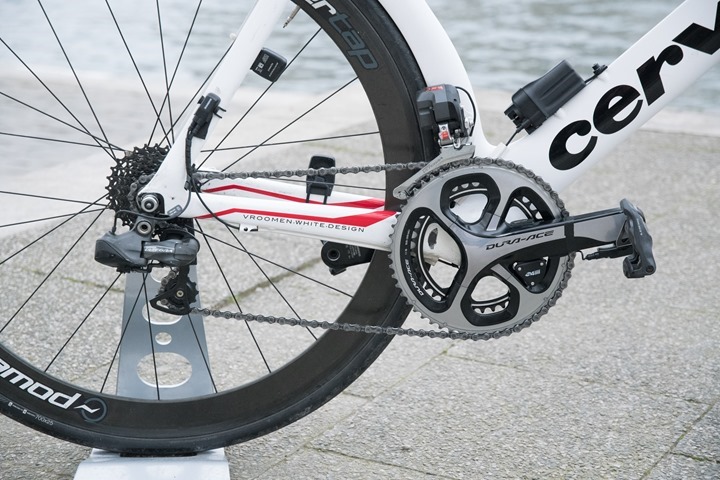
On each side of the crankset you’ll see a 4iiii Precision sensor. On the non-drive (left) side, it’s in the middle of the crank arm:
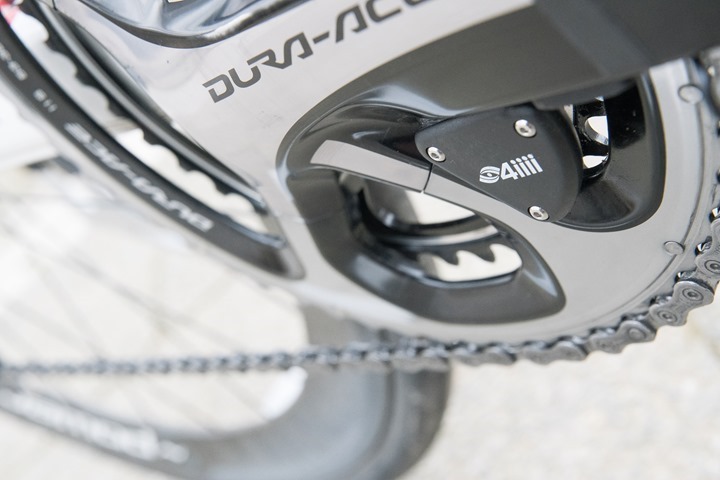
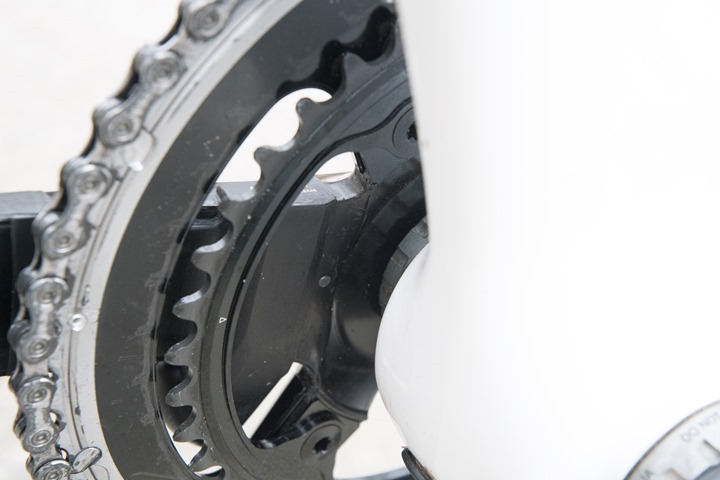
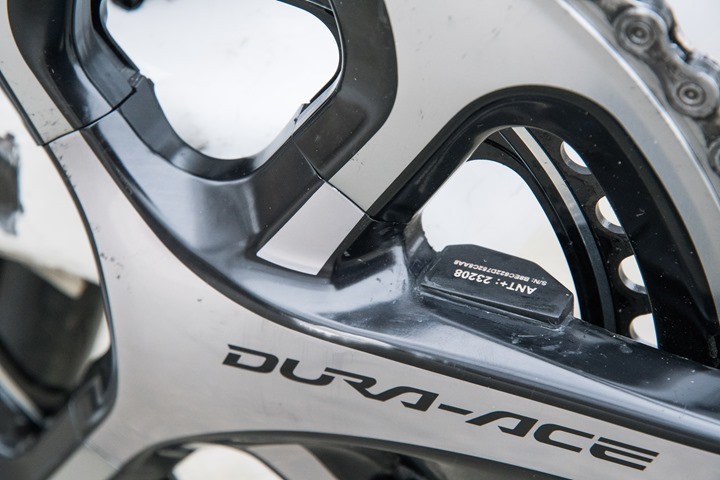
Whereas on the drive (right) side, it’s located close towards the spindle. The battery pod sticks through the spider, making it more easily accessible – but the sensor itself is actually on the right crank arm.
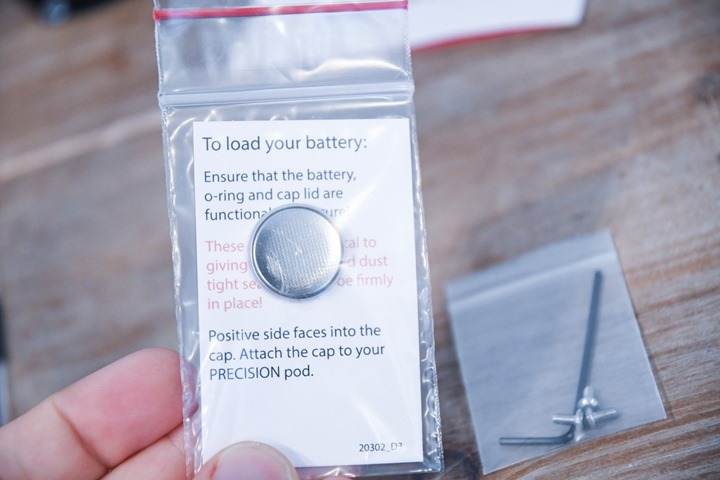
Oh, and lastly – here’s a closer look at the extra battery, as well as phone inside the phone protector. The protector is great if you ride in the rain with your phone in your jersey pocket. Note that there is *NO* requirement for using the phone during a ride. It’s purely for checking settings and such.
With that all set, let’s move forward into getting it on the bike.
Installation/Configuration:
Installation and configuration of any crank region power meter will vary heavily on which type of crankset you’re installing. It’ll also vary on whether you bought the correct version for your bottom bracket and/or bike configuration. If nothing else, spend your time doing your homework here. Generally speaking if you already have Shimano, then installation will be a breeze, since you’re replacing like with like. Whereas if you change brands/bottom bracket standards – then things get messy quick.
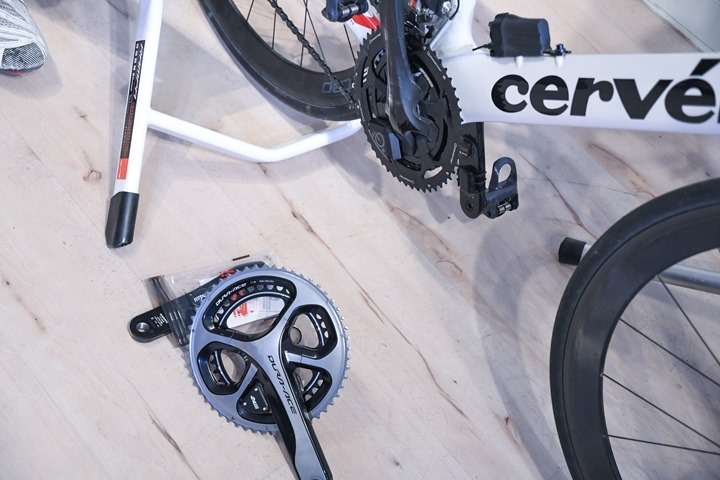
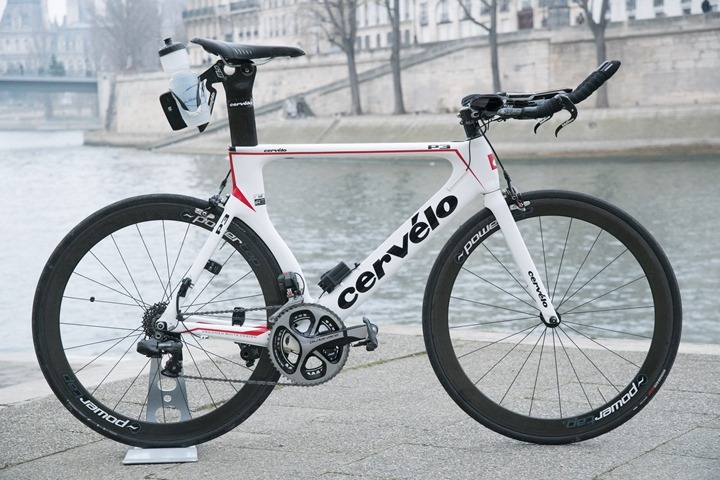
In my case, I was keeping like with like, so it was pretty straight forward. I had an existing crankset on there from before, with the new one waiting below:
To remove things, you’ll only need a simple hex wrench to loosen up the non-drive side bolt (on the left crank arm), which then allows you to then pull out the drive side crank arm – no tools required.
Note that if your left crank arm has a small plastic cover over it (see this video), you’ll remove that by rotating it counter-clockwise. Since you may not have the true ‘proper’ tool to do it, you can fake it with either a pair of pliers or scissors and then rotate using the slightly opened pliers/scissors to act as a tool. Note: Not for cutting, just for grip.
Once that’s all done, simply screw in the left arm screws to the correct torque. In general it’s best to alternate tightening each screw until snug.
After that, simply attached your pedals like normal.
And with that – you’re done. Now, we will want to do a zero offset (aka calibration), but we’ll get to that in a second.
Finally, if the instructions above weren’t detailed enough for swappage of your specific crankset, I highly recommend YouTube to find instructions on being a bike mechanic. If I’m not sure, I usually start there and go with more trusted bike focused sources like GCN, BikeRadar, Park Tools, and so on.
General Use Overview:
In many ways, the 4iiii Precision power meter is like most other units on the market. So if you’re an old hat at power meters, than honestly you’ll likely find very little new stuff in this section (though, the smartphone pieces is notable). Still, I’ll run through them for the sake of completeness. Plus, I just had mini-pizzas for lunch and have a spark of energy.
To begin, the 4iiii Precision transmits on both ANT+ & Bluetooth Smart concurrently. This means that you can use any ANT+ capable or Bluetooth Smart capable device that supports power meters. So on the ANT+ side that’s basically any Garmin cycling or triathlon focused device, as well as options from Stages (upcoming Dash head unit), Wahoo (ELEMNT), and even SRM’s latest head units like the PC8 (or trainer apps like Zwift and TrainerRoad). Meanwhile, on the Bluetooth Smart you can connect via units from Polar and Suunto, but also smartphone apps like Strava and others .
I will note that Bluetooth Smart compatibility of dual left/right units does tend to be a bit more…fussy. Companies continue to have a never-ending pissing match over standards here, and so things shift slightly from firmware to firmware and device to device. But in general people are reporting good compatibility results for the 4iiii dual units from what I’ve seen. It’s the dual-piece that’s causing companies issues since there are two connection points.
4iiii has a compatibility list linked off of this page, which lists the exact status of various head units. For example you’ll notice on their latest list that the Polar M450 is compatible, whereas the V650 isn’t.
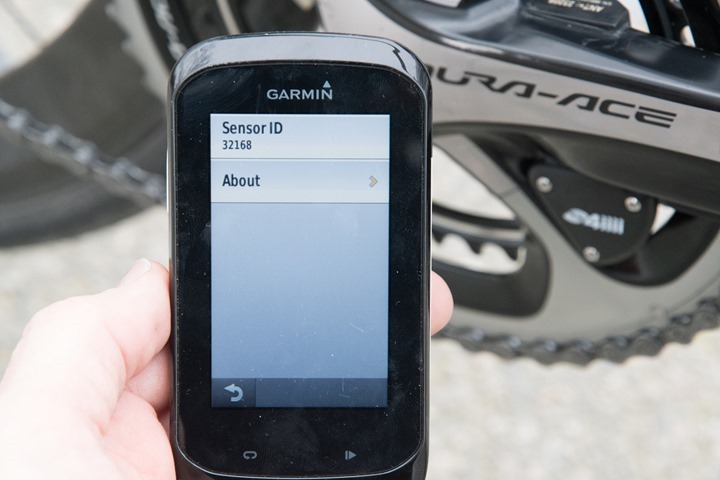
In any event, starting off with the basics on the ANT+ side you can pair to it from any head unit by searching for a power meter:
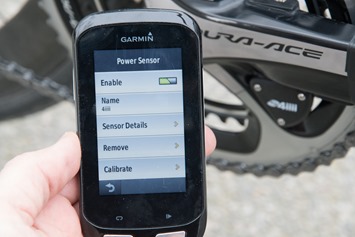
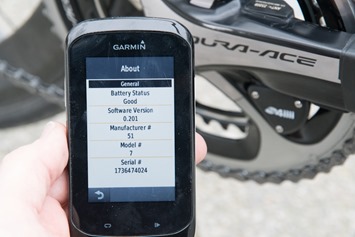
In the case of some head units you can rename the sensor from the ANT+ ID to something more friendly, like ‘4iiii Precision’. You can also check battery status this way.
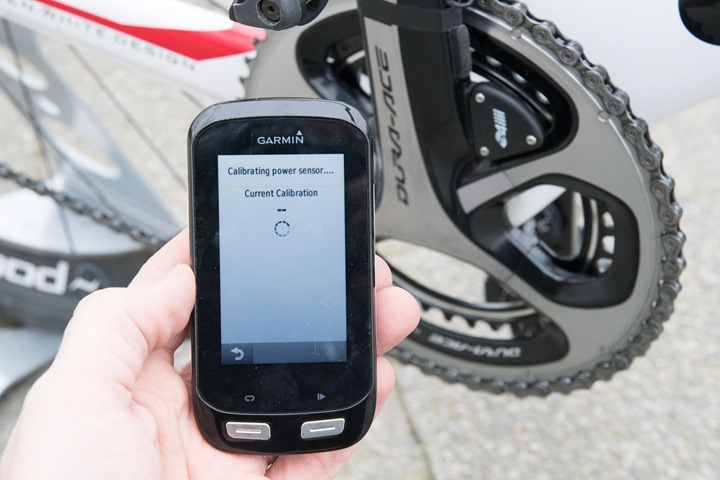
One of the most important things to do is regularly check your zero offset, which is a form of calibration. Technically there are more detailed calibration levels, but for 98% of consumers out there, the zero offset is as close as they’ll get. This allows you to monitor a given value and see if there are major changes to it. Generally speaking that number will shift with temperature, but in rare cases it can also change dramatically if something has gone wrong with the unit. But, that’s not exactly how 4iiii works.
Note that calibration should be done with the cranks in the 12/6 o’clock position.
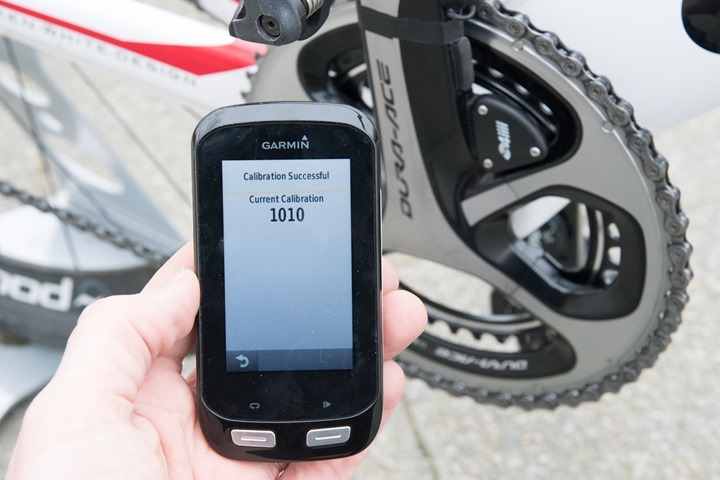
Now in earlier firmware versions, 4iiii with Precision would display the exact zero offset of both crank arms, alternating back and forth. But now instead on the latest firmware, they display the status of each side, with a simple set of six possible values:
10 – Good, ready to ride
20 – Unstable data (bike not stationary)
30 – Low battery (less than 10%)
50 – Calibration error – contact support
99 – Power meter side not found
0 – Power meter not found
So basically: 1010 as seen above is ‘Good’ on both crank arms.
The positive side to this is that it’s far easier for most people to understand. The downside is that it can make tracking calibration/drift variances harder.
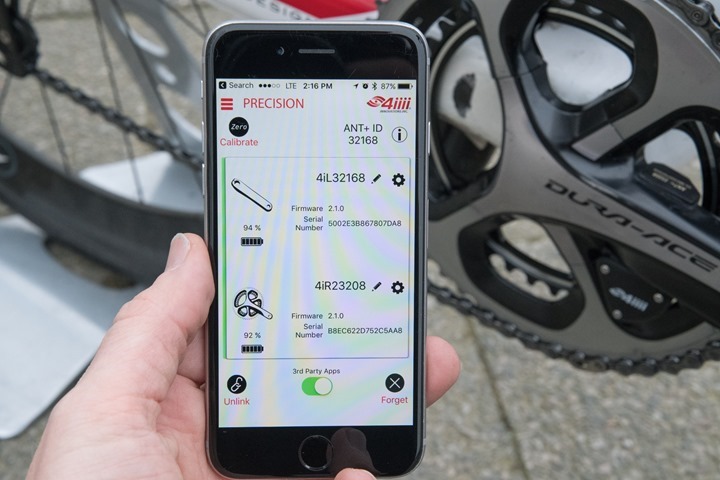
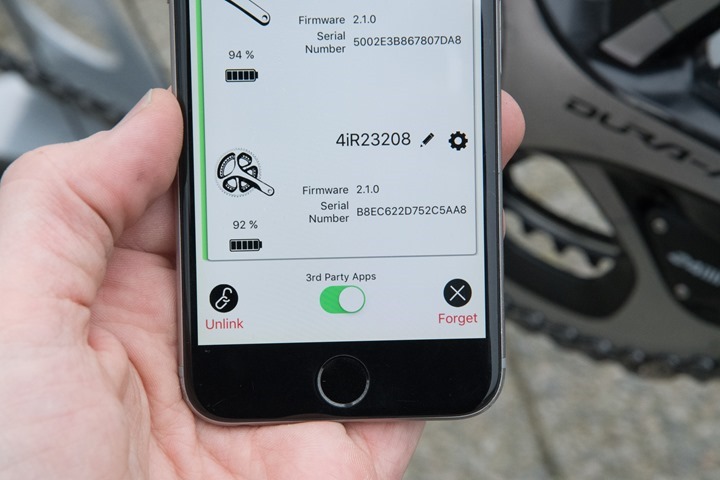
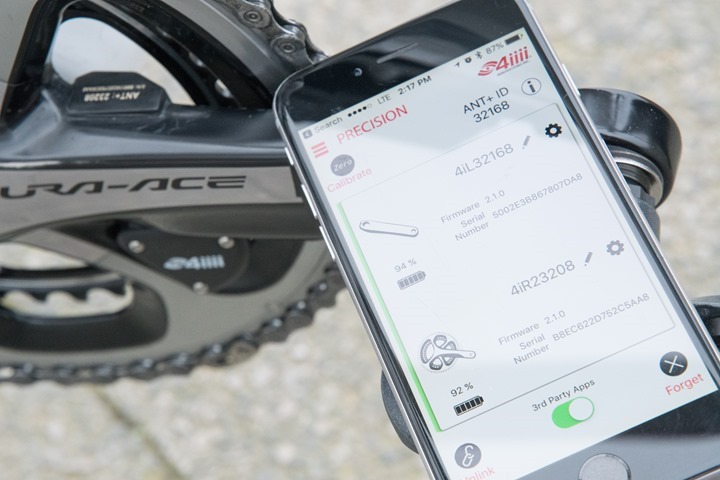
Next, we can crack open the 4iiii app and look at Precision from there. It’s here that you can start by creating a pairing between the left and right side. This effectively allows either side to operate independently. The option at the bottom allows you to unlink them.
You’ll see that you’ve got battery level listed as well, here in slightly more detail than via the Garmin head unit. You’ve also got a 3rd party apps compatibility option. This goes back to my point of challenges with some apps over Bluetooth Smart. For example Strava needs this setting configured when pairing with their smartphone app. This is because some apps can’t handle the dual data streams from both units, and instead need a consolidated data stream.
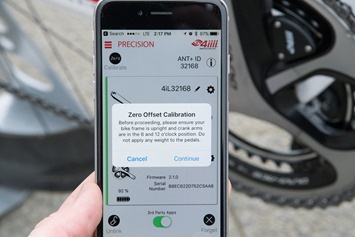
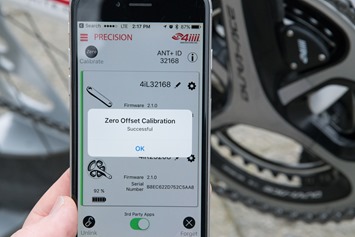
Like with your head unit you can also do a zero offset of the power meter from the app. This is useful if your app (i.e. Zwift) doesn’t support sending a calibration value. That way you can ensure your power meter is correct before starting.
Shifting slightly to the hardware itself, we’ve covered that the pods are located on both the left and right crank arms. You can see them more clearly on the left side when looking straight down on the unit, it’s the small pod:
Whereas the right side, it’s hidden behind the crank spider a bit, but you’ll notice that vertical ‘bar’ (if you will) that connects to the crank arm. That’s the right drive-side sensor.
To change the battery on the left side, you’d simply open the little battery compartment up without any tools – quick and simple:
Whereas on the right side you’ll need to use the included tiny hex wrench, to crack open that battery compartment. Both sides use CR2032 coin cell batteries, which 4iiii states should get about 100 hours of riding time.
Now one super-interesting and unique feature of the 4iiii Precision Pro dual system is that it can actually gracefully fail over from the battery dying on one side. The unit is smart enough to detect a transmission failure on one side and automatically takeover doubling the remaining power side to continue giving you total power. Basically at this point it acts like a one-legged power meter and doubles it juts as those do today.
While hopefully you’ll have heeded the low-battery messages prior to that point, it’s a pretty cool feature that I’m not aware of being on any other dual power meters in the market today (some can keep transmitting if the secondary/slave side fails, but none that I know of can dynamically switch between *either* crank arm of *either* crank arm fails).
Finally, when out on the road the unit will be broadcasting the following specs:
ANT+ Power (total)
ANT+ Power Balance (left/right)
ANT+ Cadence
ANT+ Pedal Smoothness
ANT+ Torque Effectiveness
Bluetooth Smart Power
Bluetooth Smart Power Balance
Bluetooth Smart Cadence
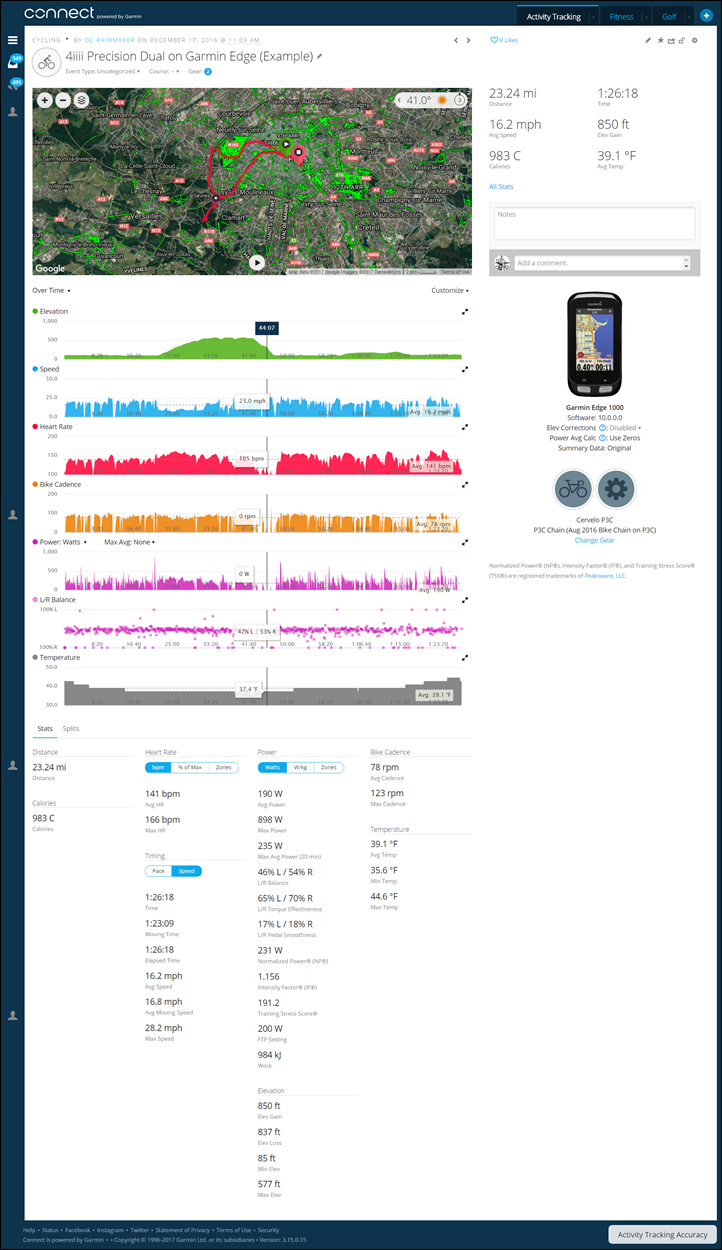
You can see this detail on the head unit itself of course, or afterwards on various platforms depending on the capabilities of the platform. For example using the baseline of Garmin Connect, here’s what you’ve got for a ride. Whereas if you pair to Suunto’s platform you won’t get some of the additional power meter metrics beyond baseline power, since Suunto doesn’t support those. Meanwhile, Polar sits somewhere in the middle on support of advanced metrics.
With all of the operational use things out of the way, let’s dive into the accuracy pieces.
Power Meter Accuracy Results:
I’ve long said that if your power meter isn’t accurate, then there’s no point in spending money on one. Strava can give you estimated power that’s ‘close enough’ for free, so if you’re gonna spend money on something it shouldn’t be a random number generator. Yet there are certain scenarios/products where a power meter may be less accurate than others, or perhaps it’s got known edge cases that don’t work. Neither product type is bad – but you just need to know what those use/edge cases are and whether if fits your budget or requirements.
But this isn’t that type of product. 4iiii Precision is designed to compete with the best power meters on the market, and designed to be used by the best athletes in the world. After all, 4iiii sponsors not just one – but two UCI World Tour Pro Teams this year, these teams that will ultimately compete for the podium in the Tour de France. So the question is: Is it actually accurate?
Well as always I set out to find that out. In power meters today one of the biggest challenges is outdoor conditions. Generally speaking indoor conditions are pretty easy to handle, but I still start there nonetheless. It allows me to dig into areas like low and high cadence, as well as just how clean numbers are at steady-state power outputs. Whereas outdoors allows me to look into water ingest concerns, temperature and humidity variations, and the all important road surface aspects (i.e. vibrations).
In my testing I generally use between 2-4 other power meters on the bike at once. I find this is the best way to validate power meters in real-world conditions. In the case of most of these tests I was using the following other units:
PowerTap G3 hub based power meter
WatTeam Gen2 power meter
Tacx NEO Trainer
CycleOps Hammer Trainer
In general my use of other products is most often tied to other things I’m testing. In this case I was testing both the WatTeam and 4iiii’s units more or less concurrently. The 4iiii started off earlier in the season (mid-fall), and then the WatTeam was added in December. Also, when it comes to data collection I use a blend of the NPE WASP data collection devices, and a fleet of Garmin head units (mostly Edge 520/820/1000 units).
Note all of the data can be found in the links next to each review. Also, at the end is a short table with the data used in this review. I’ll likely add in other data not in this review as well once I finish consolidating that data. I’m a bit behind on cleaning getting data off some of my head units into folders.
With that, let’s get started with an indoor test (data here). This one was on the CycleOps Hammer with TrainerRoad controlling it. Note that this was done prior to a Hammer firmware update that addressed some of the spikiness, so don’t mind that too much on the Hammer. Here’s the overall ride, which was 30×30’s (30 seconds hard, 30 seconds easy).
Now at this level things look good, but let’s add a bit of smoothing (10 seconds) to it and zoom in one some of the intervals.
In this case, things look really damn nice. All units are within a max spread of 10w of each other at 420w at the peaks. Slight variations are of course totally normal given placement and data collection differences. 10w on 420w is a max difference of 2.3% between the three units, well within the limits when you talk overlapping accuracy rates of 2% (thus a total of 4%). So all good.
Now total power is great (and super important), but since we are actually buying a left/right power meter, what about the left/right pieces? My analysis tool can actually split those apart and show them individually. In this case only two of the units on this ride were capable of doing left/right splits (my PowerTap P1 pedals weren’t on this bike unfortunately).
What you can see here is the upper portion of each work interval shows the right side, while the lower portion shows the left sides. And nicely, they align within 3w of each other. Sweet! You notice a slight dip in difference though on the rest portion below on one interval on the left pedal. It’s not clear to me why there’s a difference when at about 50w between the WatTeam and 4iiii Precision units though.
So, all seems good generally good though on that ERG mode structured workout. Let’s shift to another indoor workout though, this time over on Zwift. This workout was just in normal Zwift wandering mode, where I had the freedom to throw down power as I saw fit. For the most part I rode relatively steady-state, but you’ll see some sprints in here. Here’s the high level overview, smoothed at 5-seconds:
Overall things cool pretty good. You see a few drops towards the end that appear to be ANT+ drops (tell-tale sign being complete drop-out of data), mostly impacting the trainer, which was furthest from the ANT+ stick on the laptop. Focusing on the power here, I’m interested in looking at some of the sprints, so let’s do that and zoom in on the one in the middle around the 35 minute marker. First, let’s remove smoothing altogether:
What you see here is the recording interval of once per second, and the changes happening within that. What you see above (as blocky as it is), is 100% normal. Due to differences in update rates (sub-1-second) and recording rates, you’ll see slight variations like this. Still – two of the units actually hit the same max wattage of ~700w (+/-3w) within 1 second of each other. Depending on where I drag my mouse over the line, it’ll show that. The WatTeam never quite gets that close, coming in about 30w lower on this particular sprints. On other sprints it was closer. Here’s the smoothed view at 3s smoothing:
As you can see, the Hammer and 4iiii match near perfectly (there is a slight offset of one second, which could be just due to one unit being one second faster on time of day, or could be due to simply recording delay – hard to know exactly). There’s also the element that in theory the Hammer should be maybe 1-3% lower in wattage than the 4iiii unit, due to placement and drive-train loses – but again, that’d fall into the +/- 2% tolerances overlapping giving a total range of 4% between then.
Let’s shift outdoors a bit and on a longer/colder/wetter ride out into the countryside. Here’s the overview at 15s smoothing:
Overall things look pretty close between the units, minutes a few oddities later on with the WatTeam unit on a section of larger cobblestones at high speeds (other portions of the ride on smaller cobblestones were fine). But otherwise, all is mostly well.
Let’s again look at the sprint there around the 46 minute marker, zooming in at a smoothing of 3s:
We can see all three units react pretty quickly to the sprint event, which they show toping out at 818w (PowerTap G3), 800w (4iiii Precision), and 751w (WatTeam). However, if I reduce smoothing to 0 seconds, then you see slightly different results – again mostly owing to variances in recording/transmission rates.
Here (if I move my mouse over the three-second period) we see the 4iiii Precision top out at 841w, 828w for the PowerTap G3, and 768w for the WatTeam G3. It’s virtually impossible to say which one is most right (though I’d argue that the WatTeam is likely least right in this sprint).
Finally, for this we’ll take a roll down the famed Champs-Élysées– filled with cobbles that cause plenty of power meters issues.
Mid-day it’s a bit stop and go on that route, but that’s interesting anyway because it shows how quickly things react.
Above you can see that the G3 and 4iiii generally match pretty well across the board, though the WatTeam was often a little bit lower on this type of stop and go on cobbles aspect.
The stop and go is also interesting because it allows me to take a look at the cadence data. Below you can see the WatTeam and 4iiii units match nearly spot-on, whereas the G3 with it’s estimated cadence struggles a bit on the stop and go aspects, which is common for it.
Okey doke – so overall I’m just not seeing any issues with the 4iiii Precision unit from an accuracy standpoint. It’s matching other power meters on a wide variety of conditions and environmental scenarios. And numerous other tests I’ve done match these results as well as being very stable and clean from a data standpoint, both for power and accuracy data.
Here’s a small table of data covering the 4iiii Precision Dual unit. As noted, I’ve gotta dig up a smattering more data files off some head units and add them into the charts. But in the meantime, feel free to dig through this data.
4iiii Precision Data Sets
| Workout Type | DCR Analyzer Link | Products Used In Test |
|---|---|---|
| Indoors | Analyze | 4iiii Precision Dual, WatTeam Gen2, CycleOps Hammer, TrainerRoad Control |
| Indoors | Analyze | 4iiii Precision Dual, WatTeam Gen2, CycleOps Hammer, Zwift |
| Indoors | Analyze | 4iiii Precision Dual, WatTeam Gen2, CycleOps Hammer, Zwift |
| Outdoors | Analyze | 4iiii Precision Dual, WatTeam Gen2, PowerTap G3 Hub |
| Outdoors | Analyze | 4iiii Precision Dual, WatTeam Gen2, PowerTap G3 Hub |
Note that the above data is charted/plotted using the DCR Analyzer tool, which is designed specifically for comparison of sensor data such as power meters. You can read more about it here, as well as leverage it for your own tests.
Power Meter Recommendations:
With so many power meters on the market, your choices have expanded greatly in the last few years. So great in fact that I’ve written up an entire post dedicated to power meter selection: The Annual Power Meters Guide.
The guide covers every model of power meter on the market (and upcoming) and gives you recommendations for whether a given unit is appropriate for you. There is no ‘best’ power meter. There’s simply the most appropriate power meter for your situation. If you have one one type of bike I’d recommend one power meter versus another. Or if you have different needs for swapping bikes I’d recommend one unit versus another. Or if you have a specific budget or crankset compatibility, it’d influence the answers.
Now since then guide came out this past fall, there really hasn’t been any major entrants in the market that weren’t already covered in that post. However, there have been two noteworthy changes:
A) 4iiii Precision Dual Review (this post, obviously): That post didn’t cover the accuracy aspects of the left/right setup, so I didn’t dive into general recommendations. But given the data I’m seeing here – I think it’s safe to say I have no issues with recommending this as a dual left/right setup.
B) WatTeam Gen2 Dual: This unit’s review is coming up in the next few days. Though it was on the same bike as the 4iiii Precision unit, so if you simply look at the data above, you can get a feel for at least the accuracy portion of things. That’s a cheaper self-install solution at $499USD (dual).
Oh, and technically, there has been a third entrant – a company called Arofly – introduced a small accessory ‘power meter’. I’ve got one that arrived today in the US at my forwarding box (finally!), and I’ll be shipping it over in the next week or so. It’s priced very cheap, but I’m extremely hesitant to say it’ll be accurate until I’ve tested it. There’s a lot of questionable claims made on their site, starting with fabrications about their pro athletes and coaches and credentials (they aren’t pro, and they don’t exist). As such, where there’s smoke…there’s fire. Still, perhaps the tech will be better than their truth telling skills.
Summary:
It appears that 4iiii has managed to make good on their long-promised plan to get a dual left/right power meter into peoples hands on their own hardware in the $750 range. And they’ve done so with a dependable and accurate product that I’d be happy to use day in and day out. It’s sleek and barely noticeable once installed on your bike, compared to other lower priced options dual options like WatTeam or BePro. Of course, both of those companies have other benefits around portability between bikes not seen in the 4iiii solution.
Of course there are some downsides to the 4iiii Precision Pro dual solution, most namely crankset compatibility. Right now it’s only offered on a single crankset, in large part due to the challenges of fitting a sensor in/behind the drive side. Which to be fair, is pretty common for dual systems that aren’t pedal based. Meaning that if you look at other dual (ROTOR & Verve) solutions they’re extremely limited as well in compatible. As each needs to be ‘fit’ to the unique requirements of a given drive-side crankset. Whereas with pedal based solutions (i.e. Garmin Vector, PowerTap P1, BePro, Look, etc…), they have far more flexibility since they don’t have to ‘deal with’ anything near the spider of the crank.
Hopefully in time 4iiii will be able to get more dual model offerings out there for their dual setup. Though given that Shimano dominates the crankset market, they’ve clearly focused on the widest possible market penetration point. And from a business standpoint that certainly makes sense. In the meantime though, if you’re on a Shimano crankset, then this is without question one of the least expensive ways to get accurate power for dual legs.
Found this review useful? Or just wanna save 10%? Read on!
Hopefully you found this review useful. At the end of the day, I’m an athlete just like you looking for the most detail possible on a new purchase – so my review is written from the standpoint of how I used the device. The reviews generally take a lot of hours to put together, so it’s a fair bit of work (and labor of love). As you probably noticed by looking below, I also take time to answer all the questions posted in the comments – and there’s quite a bit of detail in there as well.
I’ve partnered with Clever Training to offer all DC Rainmaker readers an exclusive 10% discount across the board on all products (except clearance items). You can pickup the 4iiii Precision from Clever Training. Then receive 10% off of everything in your cart by adding code DCR10MHD at checkout. By doing so, you not only support the site (and all the work I do here) – but you also get a sweet discount. And, since this item is more than $49, you get free US shipping as well.
Thanks for reading! And as always, feel free to post comments or questions in the comments section below, I’ll be happy to try and answer them as quickly as possible. And lastly, if you felt this review was useful – I always appreciate feedback in the comments below. Thanks!


